Producing effective training content hinges significantly on the technical quality of its presentation. While instructional design and subject matter expertise form the core, poor camera work or muffled audio can undermine even the most valuable information, leading to disengagement and reduced learning retention. Investing in and understanding fundamental camera and audio principles is not merely about aesthetics; it is a direct investment in the efficacy and commercial viability of your training programs. This guide details practical camera and audio tips, focusing on their application in creating professional, clear, and engaging educational materials.
What to Look For in Camera and Audio Setup for Training Content
When selecting equipment or planning your recording environment for training content, prioritize clarity, consistency, and ease of use. For cameras, look for models offering reliable autofocus, good low-light performance, and manual control over exposure, white balance, and frame rates to adapt to various settings. Stability features, like optical image stabilization or robust tripod compatibility, are crucial for static shots common in instructional videos. Audio equipment demands even closer scrutiny: microphones should offer clear voice capture with minimal background noise, and their pickup patterns should suit your recording environment (e.g., lavalier for single speakers, shotgun for controlled environments). Consider portability and setup complexity, especially if you plan to record in multiple locations. Finally, ensure all components integrate seamlessly, whether through direct connections or compatible software, to streamline your production workflow.
1. Strategic Framing and Composition
Effective framing positions the subject within the shot to maximize clarity and engagement. For training, this often means a medium-close-up or medium shot, ensuring the instructor's face and upper body are clearly visible, allowing for natural gestures and expressions. The rule of thirds can guide placement, preventing the subject from appearing too central or off-balance. Maintain adequate headroom and lead room, avoiding cuts that feel too tight or too distant. Consistent framing across multiple segments within a single training module creates a polished, professional look that reinforces the content's authority.
Best for: Establishing a professional and engaging visual presence for instructors.
Pros:
- Directly impacts viewer perception of professionalism and credibility.
- Enhances non-verbal communication, aiding comprehension.
- Requires no additional equipment beyond careful planning.
Cons:
- Can be challenging to maintain consistency without fixed camera positions.
- Poor execution can make the video appear amateurish or distracting.
Verdict: Fundamental for visual clarity, strategic framing ensures the instructor remains the focal point without visual clutter, directly supporting the learning objective.
2. Intentional Lighting Techniques
Proper lighting is paramount for creating a professional image. The goal is to illuminate the subject evenly, reduce harsh shadows, and separate the subject from the background. A three-point lighting setup (key light, fill light, back light) is the industry standard for achieving depth and dimension. The key light provides primary illumination, the fill light softens shadows created by the key, and the back light adds separation. For simpler setups, a single softbox or large LED panel positioned slightly off-axis can provide sufficient, flattering light. Avoid overhead room lighting alone, which often creates unflattering shadows.
Best for: Enhancing visual quality, ensuring clear subject visibility, and setting a professional tone.
Pros:
- Significantly improves image quality, making the subject appear clearer and more vibrant.
- Reduces visual fatigue for viewers by providing consistent, well-exposed visuals.
- Relatively affordable entry-level lighting kits are available.
Cons:
- Can be complex to set up correctly, especially for beginners.
- Requires additional equipment and power sources.
Verdict: Critical for perceived production value, effective lighting makes the difference between a homemade video and a polished training module, directly impacting learner engagement.
3. Camera Stability and Movement Control
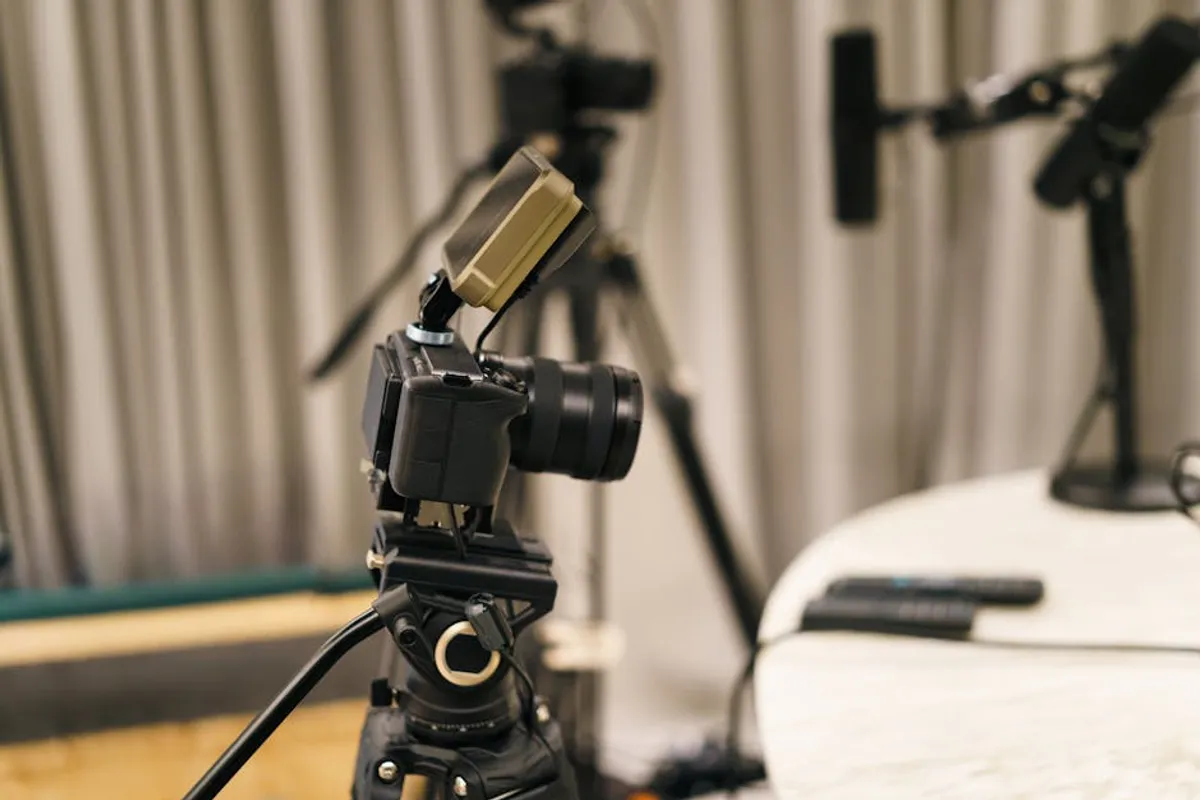
A stable shot is non-negotiable for professional training content. Handheld footage introduces distracting shake, which detracts from the message. A sturdy tripod is the most essential tool for eliminating camera movement. For dynamic training content that requires tracking movement or demonstrating processes, a fluid head tripod allows for smooth pans and tilts. Gimbals offer advanced stabilization for moving shots, but their complexity might be overkill for static instructional segments. The objective is to keep the camera still unless intentional movement serves a specific instructional purpose, such as following a demonstrator or highlighting a specific object.
Best for: Maintaining a professional, steady visual presentation free from distracting motion.
Pros:
- Eliminates distracting camera shake, improving viewer comfort and focus.
- Allows for precise framing and consistent shot composition.
- Tripods are a one-time investment that drastically improves video quality.
Cons:
- Limits spontaneous movement if not using advanced stabilization.
- Can add to setup time, especially with complex camera rigs.
Verdict: A foundational requirement for any professional video, camera stability ensures the visual content supports, rather than detracts from, the instructional message.
4. Optimized Camera Settings
Beyond composition and lighting, camera settings directly influence the final image. Record in the highest resolution feasible for your distribution platform, typically 1080p or 4K, to ensure clarity on various screens. A frame rate of 24fps or 30fps is standard for training, providing a natural look. Manual white balance is crucial; setting it to match your lighting conditions (e.g., daylight, tungsten) prevents color shifts and ensures accurate skin tones. Manual focus, if possible, guarantees the subject remains sharp throughout the recording, especially if they move slightly. Set your ISO as low as possible to minimize noise, compensating with aperture and shutter speed.
Best for: Achieving consistent, high-quality visual output tailored to specific recording conditions.
Pros:
- Ensures optimal image clarity, color accuracy, and exposure.
- Provides greater control over the final look and feel of the video.
- Prevents common issues like blurry subjects or unnatural color casts.
Cons:
- Requires a basic understanding of camera technicalities (ISO, aperture, shutter speed).
- Incorrect settings can degrade video quality significantly.
Verdict: Mastering camera settings is essential for consistent visual quality, allowing the technical aspects to support the content without becoming a distraction.
5. Thoughtful Background and Set Design
The background of your training video should be clean, uncluttered, and relevant, or at least neutral. A busy or distracting background pulls focus away from the instructor and the content. Simple backdrops, such as a plain wall, a blurred office environment, or a branded banner, are often most effective. Consider depth: positioning the instructor a few feet away from the background creates a sense of separation and allows for a pleasing background blur (bokeh) if your lens and aperture settings permit. Ensure there are no reflective surfaces causing glare or unintended reflections.
Best for: Minimizing distractions and reinforcing the professional context of the training.
Pros:
- Enhances focus on the instructor and their message.
- Contributes to a polished, professional aesthetic.
- Can be achieved with minimal cost using existing environments.
Cons:
- Requires careful planning and preparation of the recording space.
- Limited options in some recording environments.
Verdict: A well-chosen background subtly communicates professionalism and helps maintain learner focus, making it an integral part of the visual strategy.
6. Engaging Eye Contact and Presentation
For direct address training content, maintaining consistent eye contact with the camera lens simulates direct engagement with the learner. This fosters a sense of personal connection and makes the instruction feel more direct and impactful. If using a teleprompter, ensure it is positioned directly over the lens to minimize noticeable eye movement. Beyond eye contact, natural gestures and clear articulation enhance the presentation. Practice delivering content with enthusiasm and clarity, as this directly translates to viewer engagement and perceived instructor competence.
Best for: Maximizing learner engagement and perceived instructor presence.
Pros:
- Creates a stronger connection between instructor and learner.
- Enhances perceived confidence and authority of the presenter.
- Requires no equipment, only practice and intentional delivery.
Cons:
- Can be challenging for those uncomfortable speaking directly to a camera.
- Over-rehearsal can sometimes lead to an unnatural or robotic delivery.
Verdict: Direct eye contact and an engaging presentation style are critical for humanizing the training experience, directly influencing learner receptiveness and retention.
7. Optimized Microphone Selection
Audio quality often outweighs video quality in importance for training content because poor audio makes content incomprehensible. The choice of microphone is central to this. Lavalier (lapel) microphones are excellent for single speakers, offering clear, direct voice capture while being discreet. Shotgun microphones are suitable for capturing audio from a short distance, ideal for presenters who move or in controlled environments. USB microphones are convenient for desktop setups but may pick up more room noise. Avoid relying on built-in camera microphones, which typically produce hollow, distant-sounding audio.
Best for: Capturing clear, intelligible speech free from ambient noise.
Pros:
- Significantly improves speech clarity and overall audio quality.
- Different types suit various recording scenarios and budgets.
- Relatively affordable options provide substantial quality improvements.
Cons:
- Incorrect microphone choice can still lead to poor audio.
- Requires understanding of microphone types and their applications.
Verdict: The right microphone is the single most impactful investment for audio quality, directly ensuring the instructional message is heard clearly and without effort.
8. Precise Microphone Placement
Even the best microphone performs poorly if not positioned correctly. For lavalier mics, clip it about 6-8 inches below the speaker's chin, centered on the chest, to capture consistent volume and tone. Ensure it's not rubbing against clothing. For shotgun mics, position it out of frame, pointed directly at the speaker's mouth, typically above and slightly in front, or below. The closer the microphone is to the sound source, the less room reverberation and background noise it will pick up. Always do a sound check before recording to confirm optimal placement.
Best for: Maximizing microphone effectiveness and minimizing unwanted environmental noise.
Pros:
- Directly impacts the clarity and presence of the speaker's voice.
- Reduces the need for extensive post-production audio cleanup.
- Requires no additional equipment, only careful attention during setup.
Cons:
- Incorrect placement can negate the benefits of a good microphone.
- Can be tricky to achieve discreetly with certain microphone types.
Verdict: Optimal microphone placement is as important as the microphone itself, ensuring the primary audio source is captured cleanly and prominently.
9. Room Acoustics and Sound Treatment
The recording environment significantly affects audio quality. Rooms with hard, reflective surfaces (bare walls, tile floors) produce echo and reverberation, making speech sound hollow or distant. Record in spaces with soft furnishings, carpets, curtains, or bookshelves to absorb sound. Even a heavy blanket draped behind the speaker can make a difference. Minimize external noise sources like air conditioning, fans, or street sounds. If a dedicated soundproofed space isn't available, choose the quietest room and record during off-peak hours.
Best for: Reducing echo, reverberation, and ambient noise for cleaner audio.
Pros:
- Dramatically improves the naturalness and clarity of recorded speech.
- Can be achieved with common household items or inexpensive acoustic panels.
- Reduces post-production workload for noise reduction.
Cons:
- May require compromise on location or aesthetic for optimal sound.
- Professional acoustic treatment can be costly.
Verdict: Addressing room acoustics is fundamental to achieving broadcast-quality audio, directly impacting how easily learners can process and understand spoken content.
10. Consistent Audio Monitoring
Always monitor your audio with headphones during recording. This is the only way to catch issues like clipping (audio distortion from being too loud), low levels, buzzing, or unexpected background noises in real-time. Do not rely on your camera's small screen or internal speaker. Use closed-back, over-ear headphones for the most accurate sound isolation and monitoring. Adjust microphone gain levels to ensure peaks are comfortably below clipping, aiming for a target level around -6dB to -12dB on your audio meter.
Best for: Identifying and correcting audio issues during recording, preventing unusable takes.
Pros:
- Crucial for catching and fixing audio problems before they ruin a recording.
- Ensures consistent audio levels and quality throughout the session.
- Relatively inexpensive investment for a significant quality control benefit.
Cons:
- Can be uncomfortable for long recording sessions.
- Requires active attention during recording.
Verdict: Audio monitoring is a non-negotiable step in the recording process, serving as the primary quality control measure for intelligible and professional sound.
11. Post-Production Audio Editing
Even with careful recording, some post-production audio work is usually necessary. This involves noise reduction to remove subtle hums or static, equalization (EQ) to enhance clarity or remove harsh frequencies, and compression to even out volume differences between loud and soft speech. Normalization or limiting ensures the final audio is at an optimal playback level without clipping. Most video editing software includes these tools, or dedicated audio editing software can be used for more precise control. The goal is to produce audio that is consistently clear, balanced, and pleasant to listen to.
Best for: Polishing recorded audio to broadcast standards and ensuring optimal playback.
Pros:
- Corrects minor imperfections and enhances overall audio quality.
- Ensures consistent volume levels across different segments.
- Can make otherwise good audio sound exceptional.
Cons:
- Requires specific software and technical knowledge.
- Can be time-consuming, especially for long-form content.
Verdict: Post-production audio editing is the final layer of polish, transforming raw recordings into professional-grade sound that supports sustained learner attention.
12. Scripting and Teleprompter Use
For training content, a well-structured script ensures clarity, conciseness, and accuracy. It helps maintain a consistent message and prevents rambling. Using a teleprompter allows the presenter to deliver the script naturally while maintaining eye contact with the camera. This eliminates the need to memorize lines and ensures all key points are covered. Practice reading from the teleprompter to achieve a natural pace and avoid a robotic delivery. Adjust font size and scroll speed for comfort.
Best for: Ensuring content accuracy, consistency, and a polished delivery.
Pros:
- Guarantees all critical information is conveyed accurately.
- Facilitates smooth, confident delivery with consistent eye contact.
- Reduces the need for multiple takes due to forgotten lines.
Cons:
- Can lead to an unnatural reading cadence if not practiced.
- Requires additional equipment (teleprompter) or software.
Verdict: Scripting and teleprompter use are powerful tools for delivering precise, professional, and engaging training content efficiently.
13. Practice and Rehearsal
Even with the best equipment and setup, a lack of rehearsal can undermine the final product. Practice your delivery, paying attention to pacing, tone, and clarity. Rehearse with your equipment to identify any technical glitches or discomforts before the main recording. This also helps you become more comfortable in front of the camera, leading to a more natural and confident presentation. Record short practice takes and review them critically for both visual and audio issues.
Best for: Refining delivery, identifying technical issues, and building presenter confidence.
Pros:
- Improves naturalness and confidence of the presenter.
- Helps identify and resolve technical or performance issues beforehand.
- Significantly reduces the need for re-takes during the actual recording.
Cons:
- Requires dedicated time investment.
- Can be overlooked in fast-paced production schedules.
Verdict: Rehearsal is invaluable for a polished presentation, ensuring that both the technical and performance aspects of the training content are optimized for learner engagement.
14. Pre-Recording Technical Checks
Before every recording session, perform a comprehensive technical check. This includes verifying camera settings (resolution, white balance, focus), checking microphone connections and levels, ensuring batteries are charged (or power adapters are connected), and confirming sufficient storage space on memory cards. A quick test recording, reviewing both video and audio, can prevent costly re-shoots. This systematic approach minimizes unexpected technical failures that can derail a session and waste valuable time.
Best for: Preventing technical failures and ensuring a smooth, efficient recording process.
Pros:
- Eliminates common technical issues that halt production.
- Saves significant time and resources by avoiding re-shoots.
- Ensures consistent quality across all recording sessions.
Cons:
- Requires discipline to perform consistently.
- Can feel redundant, but is critical for reliability.
Verdict: A thorough pre-recording technical check is a non-negotiable safeguard, ensuring that all equipment is functioning optimally to capture high-quality training content.
How to Evaluate and Implement Your Setup
Evaluating the success of your camera and audio setup for training content goes beyond technical specifications. Focus on the learner experience: Is the instructor always clear and easy to understand? Is the visual presentation engaging without being distracting? Does the audio quality allow for effortless listening? Implement changes incrementally, testing each adjustment with a small audience or internal review. Prioritize improvements that directly address clarity and engagement. Start with fundamental changes like microphone choice and lighting before moving to more advanced techniques. The goal is to remove technical barriers to learning, allowing the content itself to shine.
Frequently Asked Questions
Q: What's the most important audio equipment for training videos?
A: A good quality external microphone is paramount. Lavalier microphones for single speakers or a shotgun mic for controlled environments will significantly improve clarity over built-in camera mics.
Q: How do I make my training videos look more professional on a budget?
A: Focus on good lighting (even natural light or a single softbox), stable camera shots (use a tripod), and clear audio (external microphone). A clean, uncluttered background also contributes significantly.
Q: Should I record in 4K for training content?
A: While 4K offers higher resolution, 1080p is often sufficient and more practical for training, especially considering file sizes and streaming bandwidth. Record in 4K if your audience requires it or if you plan to zoom/crop in post-production without losing quality.
Q: How can I reduce echo in my recording room?
A: Add soft furnishings like carpets, curtains, blankets, or acoustic panels. Even placing pillows strategically can help absorb sound waves and reduce reverberation.
Q: Is a teleprompter necessary for training videos?
A: Not strictly necessary, but highly recommended for delivering precise, consistent information while maintaining eye contact. It improves efficiency and professionalism, especially for complex or lengthy scripts.